The Power of LLM models at the Edge - AWS IoT - Part 1
The landscape of artificial intelligence is undergoing a dramatic transformation. While cloud-based AI has dominated the industry, deploying powerful AI capabilities directly on edge devices represents the next frontier in intelligent systems.
Traditional Large Language Models (LLMs) with billions of parameters have revolutionized natural language processing but remain too resource-intensive for edge deployment, creating a significant barrier to bringing advanced AI functionality to IoT devices, smart sensors, and other resource-constrained environments.
The solution? Hyper-distilled fine-tuned language models. By drastically reducing model size while preserving targeted capabilities, these compact models enable sophisticated natural language understanding and generation directly on edge devices without constant cloud connectivity.
While this 2 part blog series will not focus on fine tuned models today (coming soon!👀), we will instead use the latest distilled models from google, meta and deepseek.
In Part 1 - we will setup and deploy local language models to a RaspberryPi. This will enable us to run LLM’s totally offline. In Part 2 - we will add additional functionality to process simulated engine vibration data and use the distilled model to generate an engine health report and recommendations, also all offline!
AWS Greengrass & IoT Core
Architecture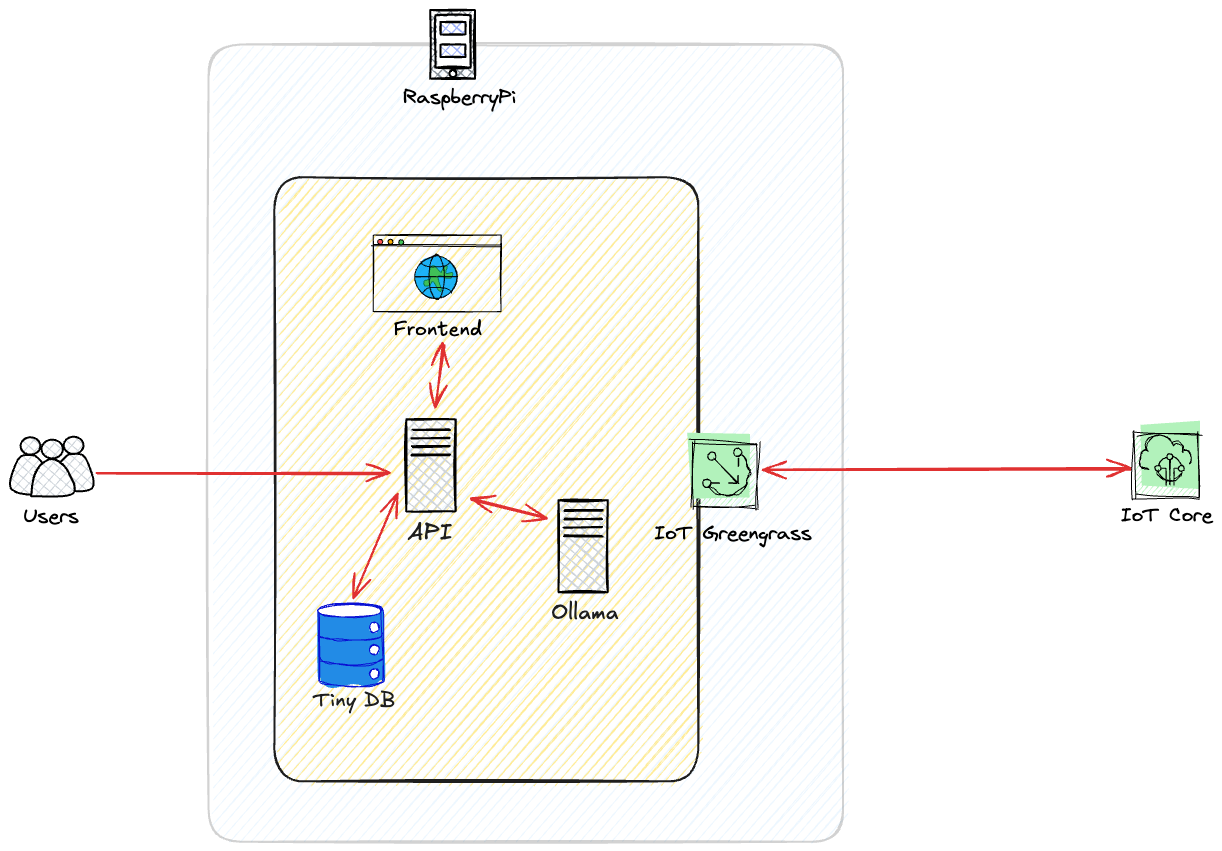
First, let’s talk about AWS Greengrass and AWS IoT Core. I’ve worked with these services for a while now, and they’re pretty solid for what we’re trying to do here.
AWS IoT Core is basically just the messaging layer for IoT stuff. It handles all the device connections, security, and pub/sub messaging with MQTT. Everything it needs to make sure your devices can talk to AWS securely. The problem is that by itself, IoT Core doesn’t let you run any code on your devices.
That’s why we need Greengrass. It lets you actually run code on your edge devices - your RaspberryPi in this case. You can deploy containerized apps, ML models, and whatever else you need directly to the device. I think of it as taking a chunk of AWS and jamming it onto my Pi.
For what we’re doing with edge LLMs, this combo works great. IoT Core handles the secure communication stuff, and Greengrass lets us run our models locally. I can push new model versions or code updates when needed, but the actual AI processing happens right on the Pi - no need to send data back and forth to the cloud.
I’ve been using Greengrass for a while now, and there are a few things that make it pretty good for what we’re doing:
- Component-based architecture: It lets me break up my app into pieces that I can update independently. Super useful when I just want to update the model without touching the rest of the app.
- Local shadows: If your device loses internet (which happens a lot with IoT), your local state is still there and it’ll sync up later when connection comes back.
- Secure deployment: Everything gets signed and verified before it runs. This is actually important - last thing you want is someone pushing rogue code to your devices.
- Resource limits: You can set CPU and memory limits per component, so your LLM won’t eat up all the resources and crash everything else.
AWS has a bunch of other IoT services (IoT Events, IoT Analytics, etc.), but honestly for running AI at the edge where you need local processing, Greengrass is the way to go. Let me show you how I set this whole thing up.
Requirements
Hardware: RaspberryPi 5 8GB - The 8GB RAM is critical for running the larger models, as 4B-parameter models can consume 4-5GB of RAM during inference, even with optimizations.
RaspberryPi 5 8GB with M.2 Hat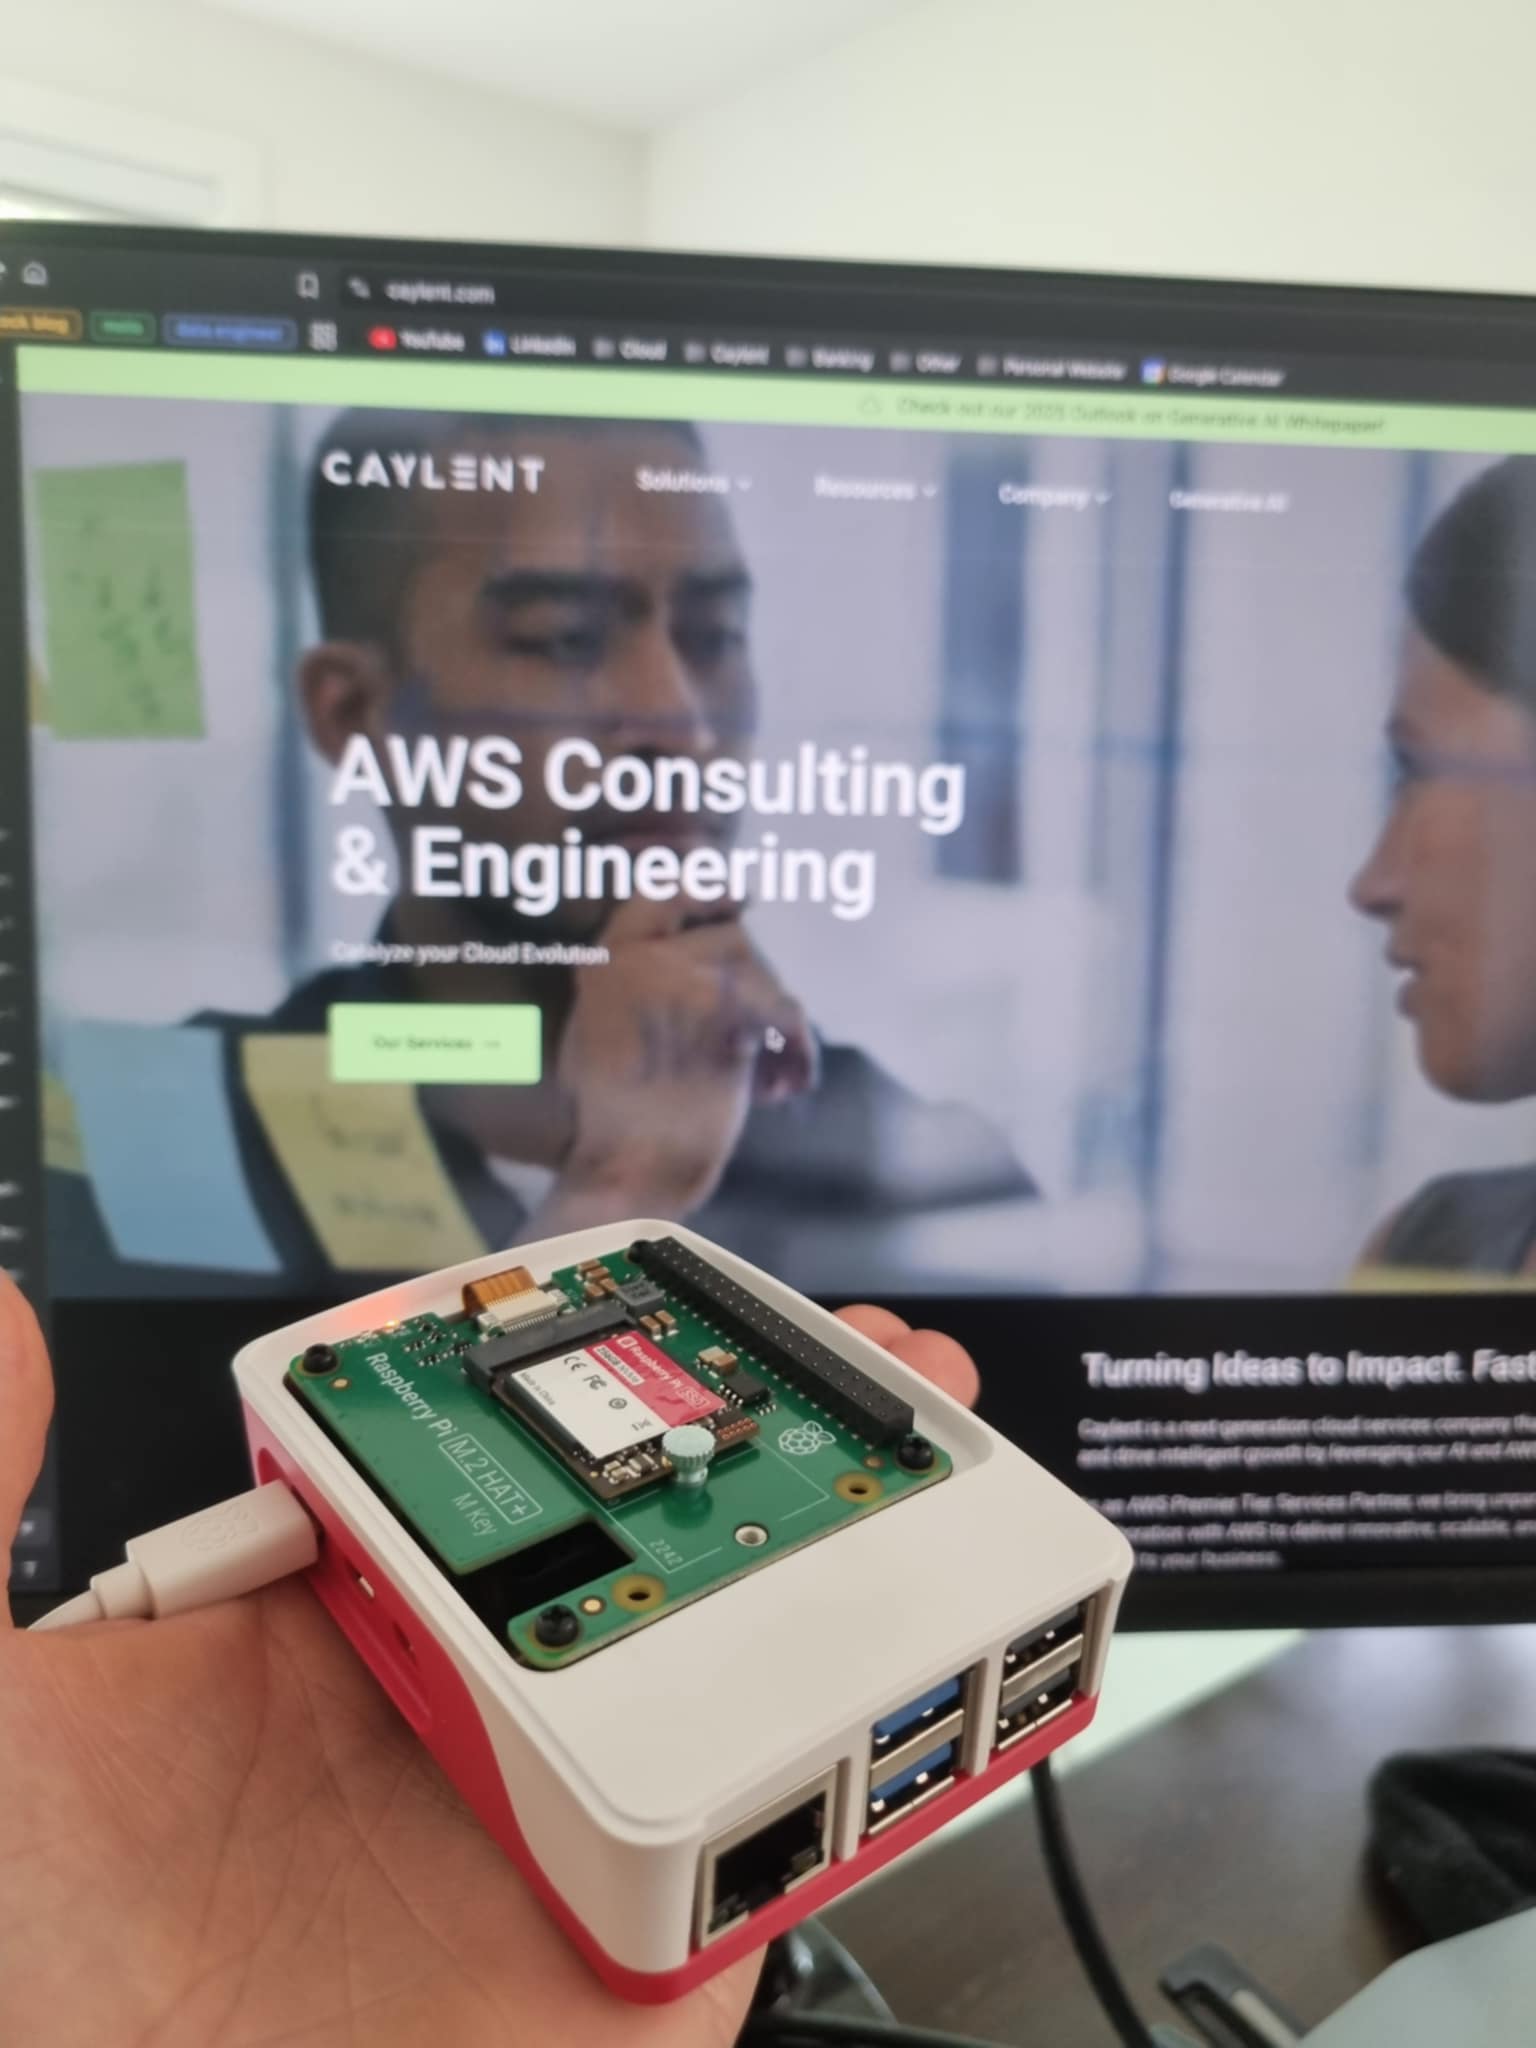
Ollama
Ollama is an incredible tool that simplifies running open-source LLMs locally. Instead of dealing with complex model loading, quantization, and inference code directly, Ollama packages everything into a simple API that handles all the heavy lifting.
What makes it perfect for our edge deployment:
- Simplified model management: Download and run models with a single command
- Optimized inference: Handles efficient inference for various hardware constraints
- API-first approach: Provides a REST API that makes integration with applications straightforward
- Model library: Access to dozens of optimized models that work well on resource-constrained devices
For our project, Ollama acts as the inference engine that powers our edge AI capabilities, allowing us to run sophisticated language models directly on the Raspberry Pi.
TinyDB
This is what makes our chat history functionality possible!
While this requirement is installed by our Greengrass component that will install this pip module, it’s worth highlighting here.
TinyDB is a lightweight document-oriented database that’s perfect for edge devices. Unlike traditional databases that need separate server processes, TinyDB runs directly in your Python application and stores data in a simple JSON file. This makes it incredibly resource-efficient - exactly what we need on a Raspberry Pi where every MB of RAM counts.
For our edge LLM application, I’m using TinyDB to persist conversation history between user sessions. Each chat gets stored as a document with message sequences, timestamps, and metadata. The beauty of this approach is that even if our application restarts or the device reboots, the conversation context isn’t lost.
RaspberryPi Setup
We’re deploying a number of services (Ollama) on the RaspberryPi outside of the scope of AWS IoT for simplicity. Anything can be packaged into a component, but we’re trying to keep this simple and digestible in this blog demo.
Base
We must first setup the device with the requirements for AWS Greengrass and the LLM application that i will run.
sudo su -
apt-get update
apt-get upgrade
apt-get install openjdk-17-jdk python3-pip sqlite3

echo fs.inotify.max_user_watches= 131070 | sudo tee -a /etc/sysctl.conf && sudo sysctl -p
Ollama
curl -fsSL https://ollama.com/install.sh | sh
ollama pull gemma3:4b
ollama pull gemma3:1b
ollama pull deepseek-r1:1.5b
ollama serve
AWS IoT Core Infrastructure
The full code can be found in the open source GitHub repo that is available along side this blog. See here
We will review the key infrastructure necessary:
IoT Things & Certificates: I’ve defined
llm-edge-coreas our IoT thing with its corresponding certificate. This creates the secure identity for our Raspberry Pi, allowing it to authenticate with AWS IoT Core while maintaining end-to-end encryption.IoT Thing Groups: The
llm-edge-core-grouporganizes our edge devices logically. Even though we’re starting with a single device, this structure allows us to scale to multiple devices with different deployment configurations later.IAM Role & Policies: The
GreengrassV2TokenExchangeRoleis crucial - it’s what allows our edge device to securely access AWS services. I’ve attached theGreengrassV2TokenExchangeRoleAccesspolicy that grants permissions for logging and S3 access while following least-privilege principles.IoT Role Alias: The
GreengrassCoreTokenExchangeRoleAliascreates a mechanism for our devices to assume the IAM role above through certificate-based authentication. This follows AWS IoT best practices by avoiding hard-coded credentials on the device.IoT Policies: I’ve created two policies:
GreengrassV2IoTThingPolicy: Grants permissions for MQTT operations and Greengrass functionalityGreengrassTESCertificatePolicyGreengrassCoreTokenExchangeRoleAlias: Enables token exchange service operations
S3 Component Bucket: A dedicated bucket
greengrass-components-<region>-<account-id>stores our Greengrass component artifacts. This is where we’ll upload the code for our LLM application, which Greengrass will then deploy to our edge devices.
This infrastructure provides the security foundation and deployment pipeline for our edge LLM project. By defining everything as code, we ensure consistency and can easily recreate the environment in different regions or accounts. The permissions are tightly scoped to follow security best practices, while still providing the necessary access for our edge AI application to function.
The component definition and deployment configuration are the next pieces of the puzzle, which we’ll explore in the following sections.
AWS Greengrass Core
The AWS IoT Greengrass Core software includes an installer that sets up your device as a Greengrass core device. The installer requires AWS credentials.
On your Edge LLM core device, download the AWS IoT Greengrass Core software to a file named greengrass-nucleus-latest.zip.
curl -s https://d2s8p88vqu9w66.cloudfront.net/releases/greengrass-nucleus-latest.zip > greengrass-nucleus-latest.zip
Unzip the AWS IoT Greengrass Core software to a folder on your Edge LLM core device.
unzip greengrass-nucleus-latest.zip -d GreengrassInstaller && rm greengrass-nucleus-latest.zip
Now you must authenticate to AWS on the device. The simplest way to do this is to provide credentials as environment variables. e.g.
export AWS_ACCESS_KEY_ID=<AWS_ACCESS_KEY_ID>
export AWS_SECRET_ACCESS_KEY=<AWS_SECRET_ACCESS_KEY>
export AWS_SESSION_TOKEN=<AWS_SESSION_TOKEN>
Run the AWS IoT Greengrass Core installer.
sudo -E java -Droot="/greengrass/v2" -Dlog.store=FILE \
  -jar ./GreengrassInstaller/lib/Greengrass.jar \
  --aws-region us-east-1 \
  --thing-name llm-edge-core \
  --thing-group-name llm-edge-core-group \
  --thing-policy-name GreengrassV2IoTThingPolicy \
  --tes-role-name GreengrassV2TokenExchangeRole \
  --tes-role-alias-name GreengrassCoreTokenExchangeRoleAlias \
  --component-default-user ggc_user:ggc_group \
  --provision true \
  --setup-system-service true
Behind the scenes, this installer is doing several critical operations:
- Creating a new device certificate and private key
- Registering the device with AWS IoT Core
- Downloading root CA certificates for secure TLS connections
- Setting up the Greengrass nucleus as a systemd service
- Creating the component runtime environment
- Setting up IPC (inter-process communication) mechanisms
Once the installation is complete you will see the following response
Provisioning AWS IoT resources for the device with IoT Thing Name: [llm-edge-core]...
Found IoT policy "GreengrassV2IoTThingPolicy", reusing it
Creating keys and certificate...
Attaching policy to certificate...
Creating IoT Thing "llm-edge-core"...
Attaching certificate to IoT thing...
Successfully provisioned AWS IoT resources for the device with IoT Thing Name: [llm-edge-core]!
Adding IoT Thing [llm-edge-core] into Thing Group: [llm-edge-core-group]...
IoT Thing Group "llm-edge-core-group" already existed, reusing it
Successfully added Thing into Thing Group: [llm-edge-core-group]
Setting up resources for aws.greengrass.TokenExchangeService ...
Attaching TES role policy to IoT thing...
No managed IAM policy found, looking for user defined policy...
IAM policy named "GreengrassV2TokenExchangeRoleAccess" already exists. Please attach it to the IAM role if not already
Configuring Nucleus with provisioned resource details...
Downloading CA from "https://www.amazontrust.com/repository/AmazonRootCA1.pem"
Created device configuration
Successfully configured Nucleus with provisioned resource details!
Successfully set up Nucleus as a system service
Deploying the application
From your personal device, you must install the AWS Greengrass Development Kit Command-Line Interface (GDK CLI).
python3 -m pip install -U git+https://github.com/aws-greengrass/aws-greengrass-gdk-cli.git@v1.6.2
From here, you can clone my open source repo for this project here and navigate to the edge-llm directory.
git clone https://github.com/JeremyRitchie/iot-edge-llm
cd iot-edge-llm/edge-llm
You must then authenticate to AWS and then build and publish the IoT component. The build step creates a zip file of all artifacts and generates a recipe file with the component’s metadata and dependencies.
gdk component build
gdk component publish
Under the hood, this is:
- Creating a component recipe in JSON format
- Packaging our application code
- Uploading the artifacts to the S3 bucket we created earlier
- Registering the component with AWS IoT Greengrass
Now let’s create the deployment:
aws greengrassv2 create-deployment \
  --target-arn "arn:aws:iot:us-east-1:747340109238:thing/llm-edge-core" \
  --deployment-name "EdgeLLM-Deployment" \
  --components '{
    "com.jeremyritchie.EdgeLLM": {
      "componentVersion": "1.0.0"
    },
    "aws.greengrass.Nucleus": {
      "componentVersion": "2.14.3"
    },
    "aws.greengrass.Cli": {
      "componentVersion": "2.14.3"
    }
  }' \
  --region us-east-1
This initiates a deployment that will:
- Download our components to the target device
- Verify the cryptographic signatures
- Stop any previous versions of components
- Extract the artifacts and run the installation scripts
- Start the components in dependency order
- Monitor their health
This will trigger the first deployment to the Greengrass device. Let’s check it out within AWS. Greengrass Deployment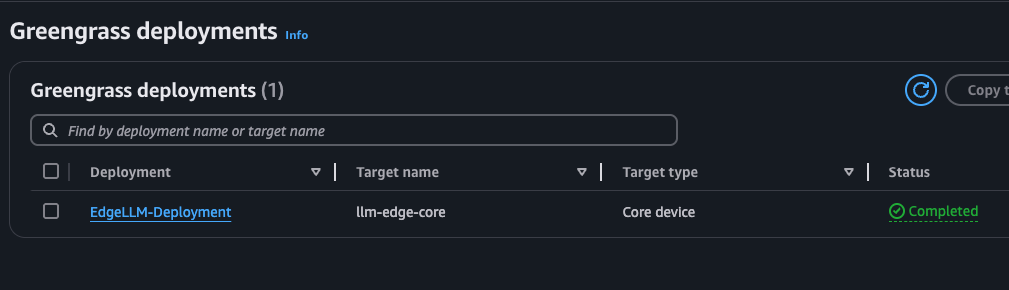
Success!
I’ll get the IP of my RaspberryPi by running ifconfig and then load that ip in my web browser on port 8081.
Our running application!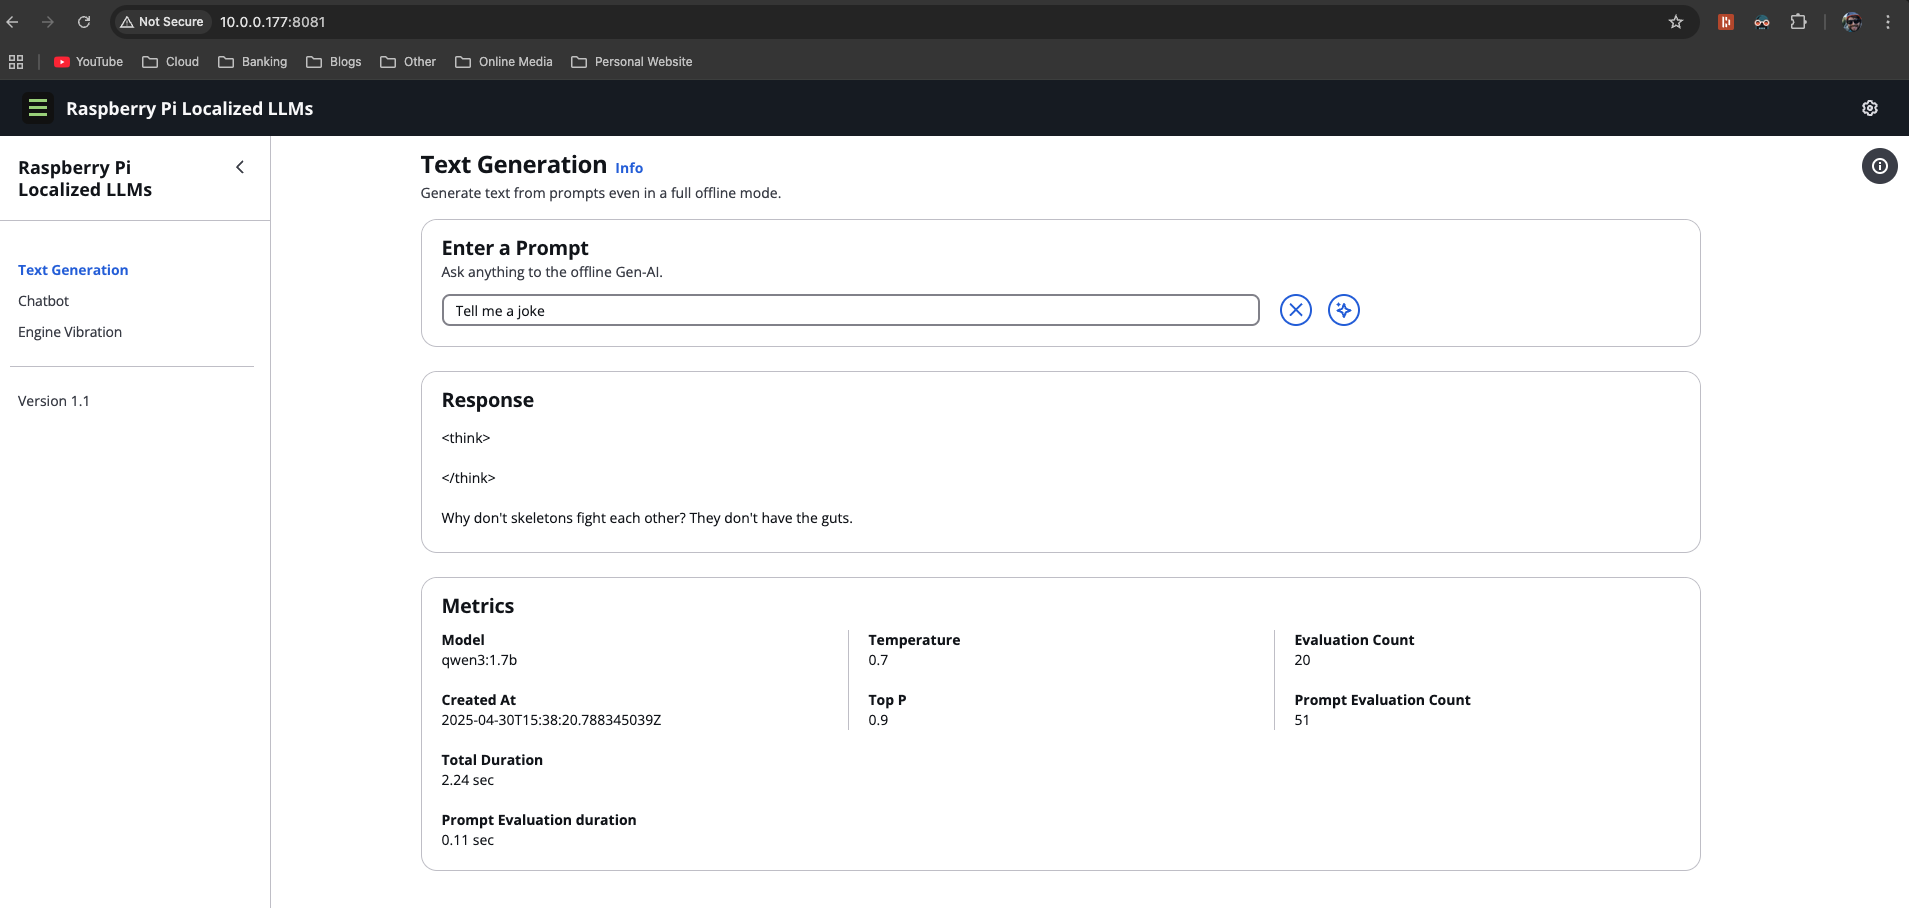
As you can see, the offline AI is working very well. Thanks to Ollama and AWS Greengrass for making things super simple for our deployment.
If we check the resource usage with htop, we can see the model using about 4-5GB of RAM during inference, but the memory-mapped model files and quantization keep things running smoothly on our Pi.
Let’s test the chatbot functionality.
Chatbot with history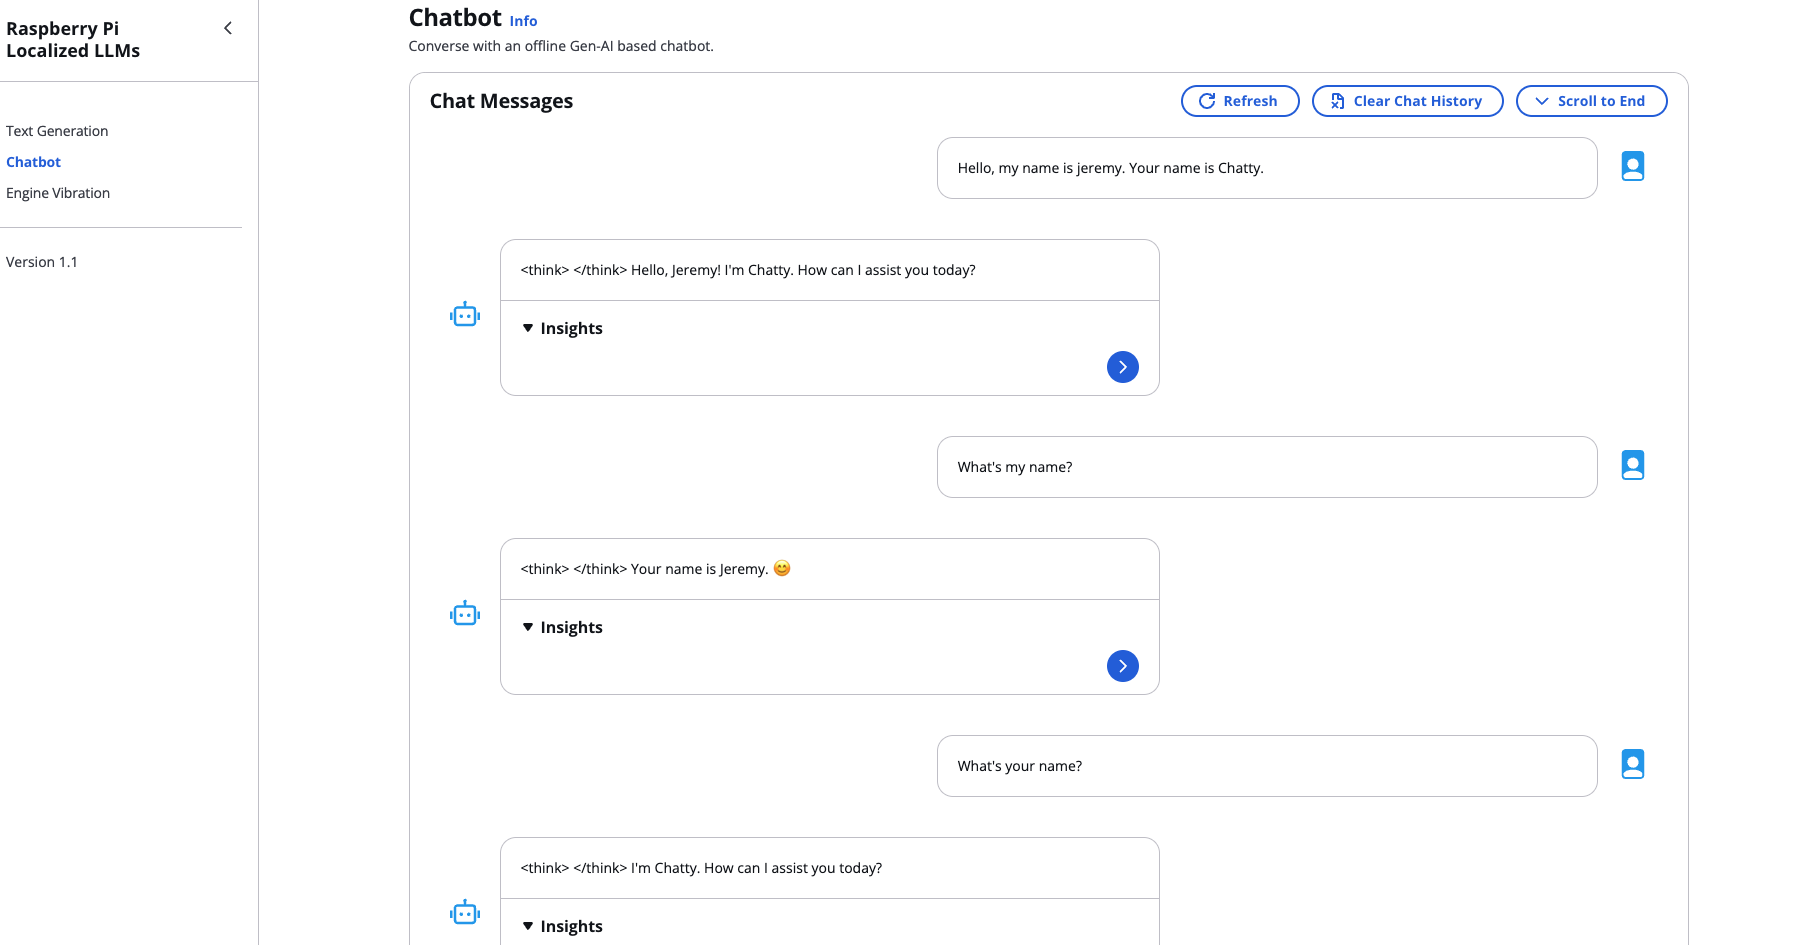
The response latency is actually quite good for a device this size - each token generates in about 50-150ms, resulting in human-like typing speed. The 4-bit quantization of the qwen3 model means we lose a small amount of quality, but the tradeoff is absolutely worth it for being able to run completely offline.
Conclusion
Edge-deployed LLMs represent a paradigm shift in how we think about AI applications. By bringing the power of language models directly to IoT devices, we can perform sophisticated analyses without constant cloud connectivity or data transfers.
In this first part of our series, we’ve seen how to:
- Set up a Raspberry Pi with the necessary software stack for edge AI
- Configure Ollama for local model inference
- Deploy and manage our edge application using AWS Greengrass
- Create the infrastructure as code using Terraform for scalability
The benefits of this approach are enormous - reduced latency, enhanced privacy, lower bandwidth needs, and continued functionality during network outages. As distilled models continue to improve, we’ll see even more powerful capabilities become available at the edge.
In Part 2, we’ll take this foundation and build something really practical - an engine monitoring system that can detect potential issues using vibration data, generate comprehensive reports, and provide maintenance recommendations - all computed directly on the edge device without cloud dependencies.
Stay tuned, and in the meantime, I’d love to hear about your own experiments with edge AI in the comments!