Serverless Upgrade Path in AWS (Part 1)

This is part one, of a two part series on serverless architecture.
In the process of migrating to the cloud, many companies take this opportunity to harness the cloud’s unique capabilities to achieve greater performance, scalability and elasticity by shifting towards serverless compute options. Going serverless can reduce the burden of managing infrastructure and reduce your cloud costs if utilized correctly.
Serverless, however, isn’t a silver bullet. Serverless can cost more while also being less performant.
Two key factors that effect serverless suitability:
- What type of application is it?
- What are the access patterns on the application?
That’s the importance of informed advice and guidance when migrating to or re-architecting in the cloud.
Today, we will examine two architectures:
- Stage 1 - Basic non-serverless architecture.
- Stage 2 - The beginning of our serverless journey - what mistakes will we make?
In Serverless Upgrade Path in AWS (Part 2) we will explore how our serverless upgrade path was flawed and what better approaches there are to upgrade our serverless architecture incrementally, with reduced transformation risk and business disruption.
Table of contents
Compute Delta
Reducing the compute delta between purchased compute and necessary compute is a primary way serverless can save you money.
The metric of compute delta is what we will be using to judge what serverless stage an architecture is at.
Compute Delta isn’t a perfect metric though. The delta can be reduced without changing your compute platform at all. Fine-tuned auto scaling or extremely predictive workloads can achieve a very low compute delta. Let’s ignore those edge cases for now and simply focus on reducing compute delta for our example application.
Example Application
For this series, our application will be a simple REST API.
Assumptions:
- The REST API and the associated database experience volatile and unpredictable loads.
- There is no auto scaling configuration that can match demand without large pre-provisioned capacity resulting in a large compute delta.
Stage 1 - Denial
Here’s where many companies begin with their cloud migration.
They are familiar with VM’s and 1:1 replacement from on-prem to AWS VM’s was the safest way they felt they could migrate to the cloud with minimal disruption. It doesn’t get any more vanilla than this architecture.
Architecture
Stage 1 Architecture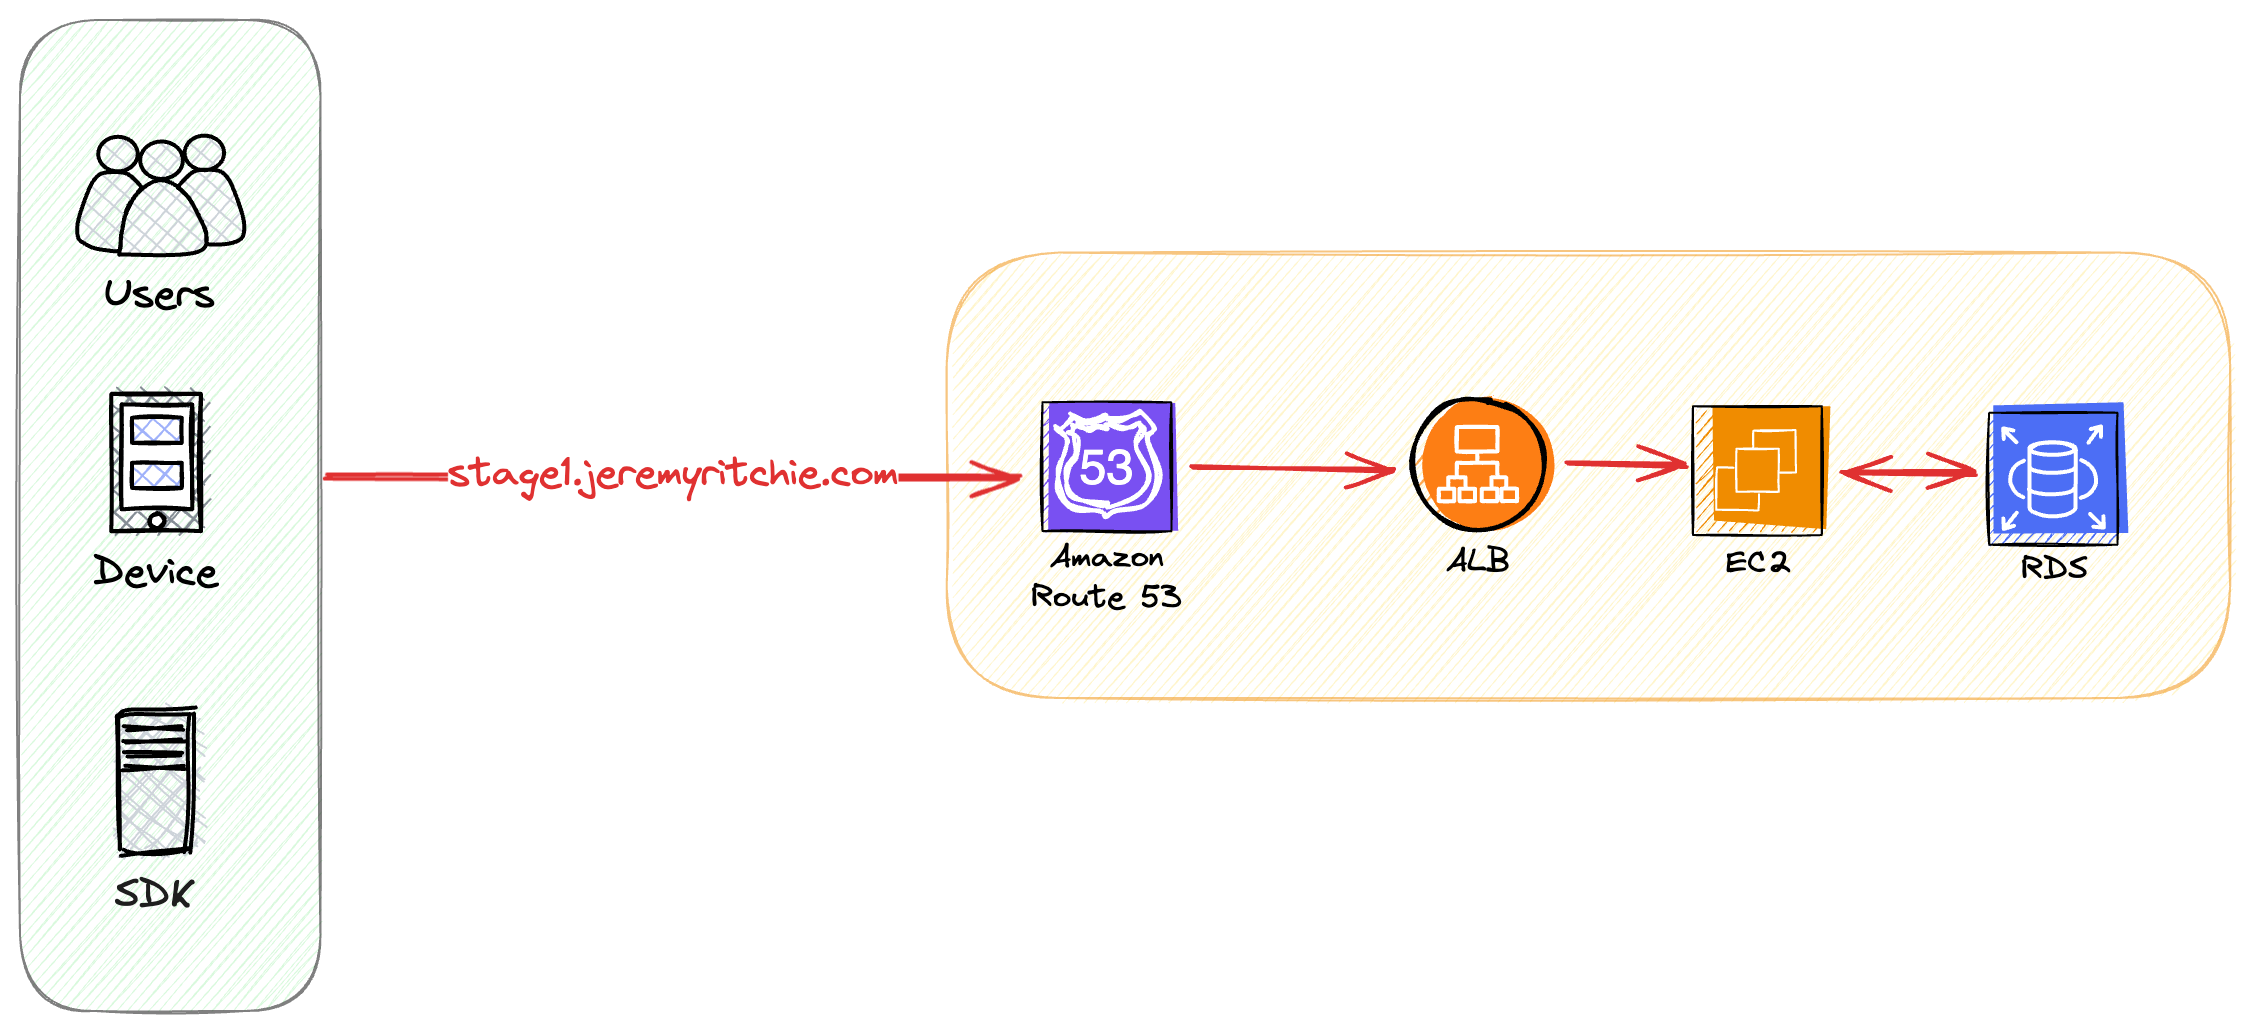
In this architecture, a REST API is deployed on EC2 instances in an auto scaling group, with an application load balancer out front.
The EC2 and RDS instances are over-provisioned so they can handle peak loads, leading to compute waste during non-peak times. High compute delta.
Our example application has highly volatile traffic and that requires the auto scaling group to maintain a large compute capacity buffer so it has enough time to scale up if demand rapidly increases.
This is a prime candidate for a migration to serverless infrastructure. It’s highly likely that this application will reduce operational costs and be more performant when migrated to serverless. The trick is this needs to be done correctly otherwise we might end up paying more for less.
Compute Delta (Lower is better)
- Compute: 8/10
- Database: 10/10
Press here to skip to stage 1 discussion
Stage 1: Root URL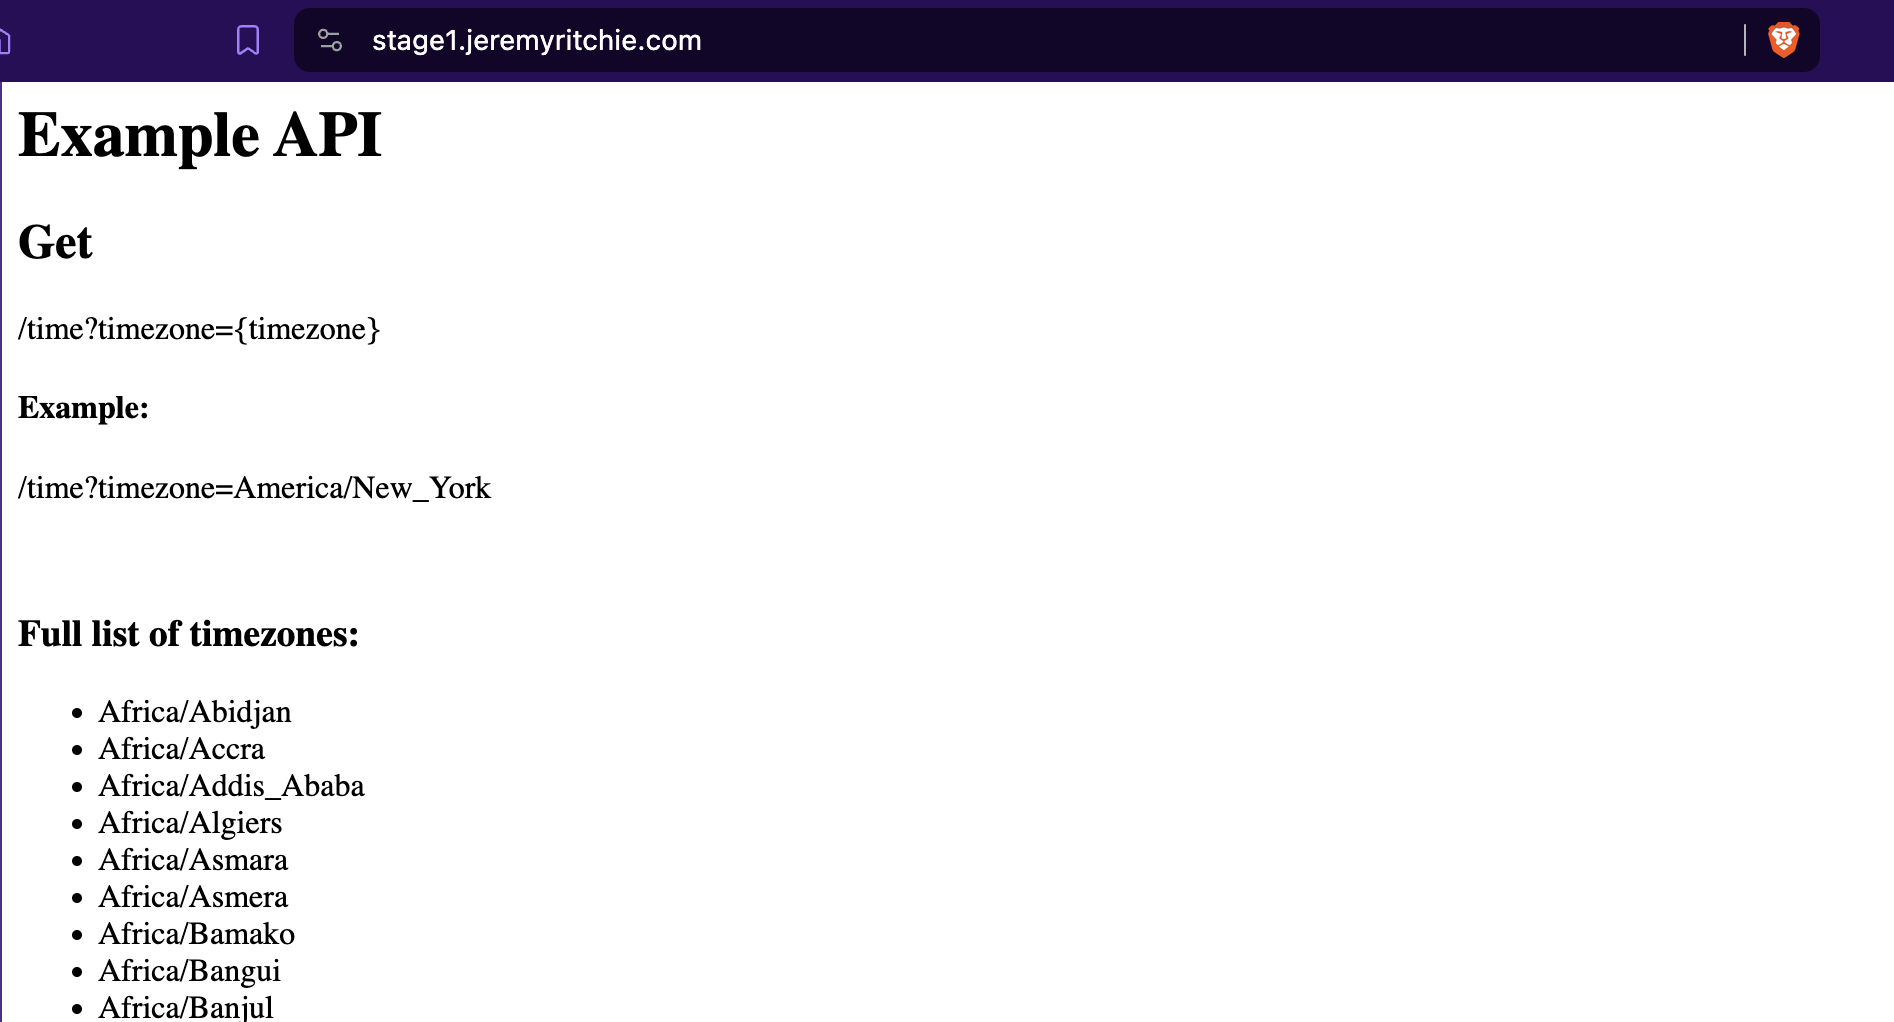
Stage 1: Time API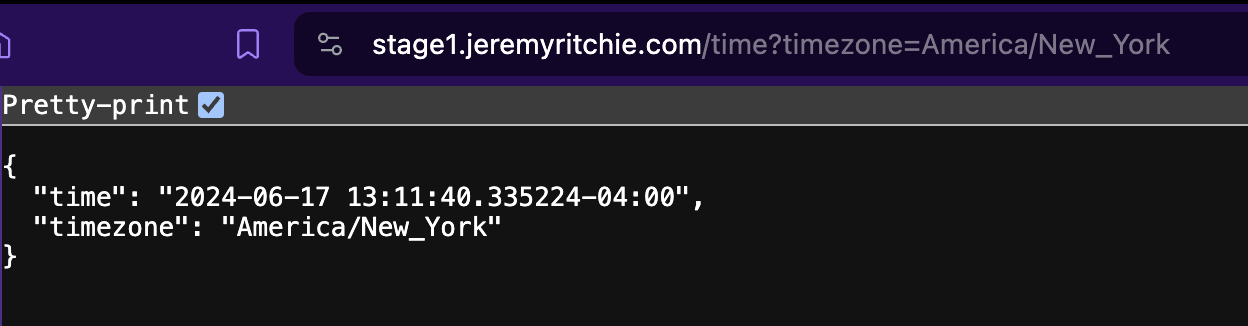
Code
Stage 1 Construct
export class Stage1 extends Construct {
  constructor(scope: Construct, id: string, props: Stage1Props) {
    super(scope, id);

    const base = new BaseStack(this, 'BaseStack', {
        env: props.env,
        cidr: '10.100.0.0/16',
    });

    const route53 = new Route53Stack(this, 'Route53Stack', {
        env: props.env,
        subdomain: 'stage1'
    });

    const alb = new ALBStack(this, 'ALBStack', {
        env: props.env,
        baseStack: base,
        targetType: elbv2.TargetType.INSTANCE,
        route53Stack: route53,
        enableHttps: true,
        enableHttpRedirect: true,
        createDNSRecord: true,
    });

    const asg = new ASGStack(this, 'ASGStack', {
        env: props.env,
        baseStack: base,
        albStack: alb,
        imageName: 'ecr-image-id:tag',
    });

    new RDSStack(this, 'RDSStack', {
        env: props.env,
        baseStack: base,
        asgStack: asg,
    });
  }
}
VPC
export class BaseStack extends Stack {
  vpc: ec2.IVpc;
  constructor(scope: Construct, id: string, props: BaseStackProps) {
    super(scope, id, props);

    this.vpc = new ec2.Vpc(this, 'VPC', {
        maxAzs: 2,
        createInternetGateway: true,
        subnetConfiguration: [
            {
                name: 'public',
                subnetType: ec2.SubnetType.PUBLIC,
            },
            {
                name: 'private',
                subnetType: ec2.SubnetType.PRIVATE_WITH_EGRESS,
            }
        ],
        natGateways: 1,
        ipAddresses: ec2.IpAddresses.cidr(props.cidr),
    });
  }
}
We’re creating a two tier network.
- Public
- Private (with NAT Gateway for egress)
Our Public resources (ALB, NAT Gateway) will be deployed into the public subnets. All remaining resources (EC2, RDS) will be deployed into the private subnets, but maintain connectivity to the internet via the NAT Gateway.
The BaseStack will be used for each stage of our serverless architecture.
Route53 & ACM
export class Route53Stack extends Stack {
    cert: acm.Certificate;
    hostedzone: route53.IHostedZone;
    subdomain: string;
  constructor(scope: Construct, id: string, props: Route53StackProps) {
    super(scope, id, props);

    this.subdomain = props.subdomain;
    this.hostedzone = route53.HostedZone.fromLookup(this, 'HostedZone', {
        domainName: 'jeremyritchie.com',
    });

    this.cert = new acm.Certificate(this, 'Certificate', {
        domainName: props.subdomain + '.jeremyritchie.com',
        validation: acm.CertificateValidation.fromDns(this.hostedzone),
    });
  }
}
To use HTTPS with a custom domain name for our ALB we need to create SSL/TLS certificates and Alias A records for the ALB.
We’ve imported the hosted zone jeremyritchie.com and will use it for the stage1.jeremyritchie.com certificates and Alias A records.
The BaseStack will be used for every stage of our serverless architecture.
Application load balancer
export class ALBStack extends Stack {
  alb: elbv2.ApplicationLoadBalancer;
  targetGroup: elbv2.ApplicationTargetGroup;
  constructor(scope: Construct, id: string, props: ALBStackProps) {
    super(scope, id, props);

    this.alb = new elbv2.ApplicationLoadBalancer(this, 'ALB', {
        vpc: props.baseStack.vpc,
        internetFacing: true,
    });

    this.targetGroup = new elbv2.ApplicationTargetGroup(this, 'TargetGroup', {
        vpc: props.baseStack.vpc,
        port: 8080,
        protocol: elbv2.ApplicationProtocol.HTTP,
        targetType: props.targetType,
        deregistrationDelay: Duration.seconds(0),
    });

    if (props.enableHttps) {
        this.alb.addListener('HTTPS', {
            port: 443,
            protocol: elbv2.ApplicationProtocol.HTTPS,
            defaultAction: elbv2.ListenerAction.forward([this.targetGroup]),
            certificates: [props.route53Stack.cert]
        });
    }

    if (props.enableHttpRedirect) {
        this.alb.addListener('HTTP', {
            port: 80,
            protocol: elbv2.ApplicationProtocol.HTTP,
            defaultAction: elbv2.ListenerAction.redirect({
                protocol: 'HTTPS',
                port: '443',
                permanent: true,
            }),
        });
    } else {
        this.alb.addListener('HTTP', {
            port: 80,
            protocol: elbv2.ApplicationProtocol.HTTP,
            defaultAction: elbv2.ListenerAction.forward([this.targetGroup]),
        });
    }

    if (props.createDNSRecord) {
        new route53.ARecord(this, 'AliasRecord', {
            zone: props.route53Stack.hostedzone,
            target: route53.RecordTarget.fromAlias(new route53_targets.LoadBalancerTarget(this.alb)),
            recordName: props.route53Stack.subdomain,
        });
    }
  }
}
The ALB will load balance traffic between all EC2 instances in the auto scaling group. SSL/TLS also terminate at the ALB.
We will reuse this class for Stages 1, 2 and 3.
Auto Scaling Group
export class ASGStack extends Stack {
    securityGroup: ec2.SecurityGroup;
    asg: autoscaling.AutoScalingGroup;
  constructor(scope: Construct, id: string, props: ASGStackProps) {
    super(scope, id, props);

    this.securityGroup = new ec2.SecurityGroup(this, 'InstanceSecurityGroup', {
        vpc: props.baseStack.vpc,
    });

    const launchTemplate = new ec2.LaunchTemplate(this, 'LaunchTemplate', {
        machineImage: ec2.MachineImage.latestAmazonLinux2023(
            {
                cpuType: ec2.AmazonLinuxCpuType.ARM_64,
            }
        ),
        instanceType: new ec2.InstanceType('t4g.medium',),
        securityGroup: this.securityGroup,
        role: new iam.Role(this, 'InstanceRole', {
            assumedBy: new iam.ServicePrincipal('ec2.amazonaws.com'),
            managedPolicies: [
                iam.ManagedPolicy.fromAwsManagedPolicyName('service-role/AmazonEC2RoleforSSM'),
                iam.ManagedPolicy.fromAwsManagedPolicyName('AmazonEC2ContainerRegistryPowerUser'),
            ],
        }),
        userData: ec2.UserData.custom(
`#!/bin/bash
yum update -y
yum install -y docker
usermod -a -G docker ec2-user
id ec2-user
newgrp docker
service docker start
service docker status
aws ecr get-login-password --region ${this.region} | docker login --username AWS --password-stdin ${this.account}.dkr.ecr.${this.region}.amazonaws.com
docker pull ${this.account}.dkr.ecr.${this.region}.amazonaws.com/${props.imageName}
docker run -d -p 8080:8080 ${this.account}.dkr.ecr.${this.region}.amazonaws.com/${props.imageName}`),
    });

    this.asg = new autoscaling.AutoScalingGroup(this, 'Asg', {
        vpc: props.baseStack.vpc,
        vpcSubnets: { subnetType: ec2.SubnetType.PRIVATE_WITH_EGRESS },
        minCapacity: 1,
        maxCapacity: 2,
        desiredCapacity: 1,
        launchTemplate: launchTemplate,
    });

    this.asg.connections.allowFrom(props.albStack.alb, ec2.Port.tcp(8080));
    this.asg.attachToApplicationTargetGroup(props.albStack.targetGroup);

  }
}
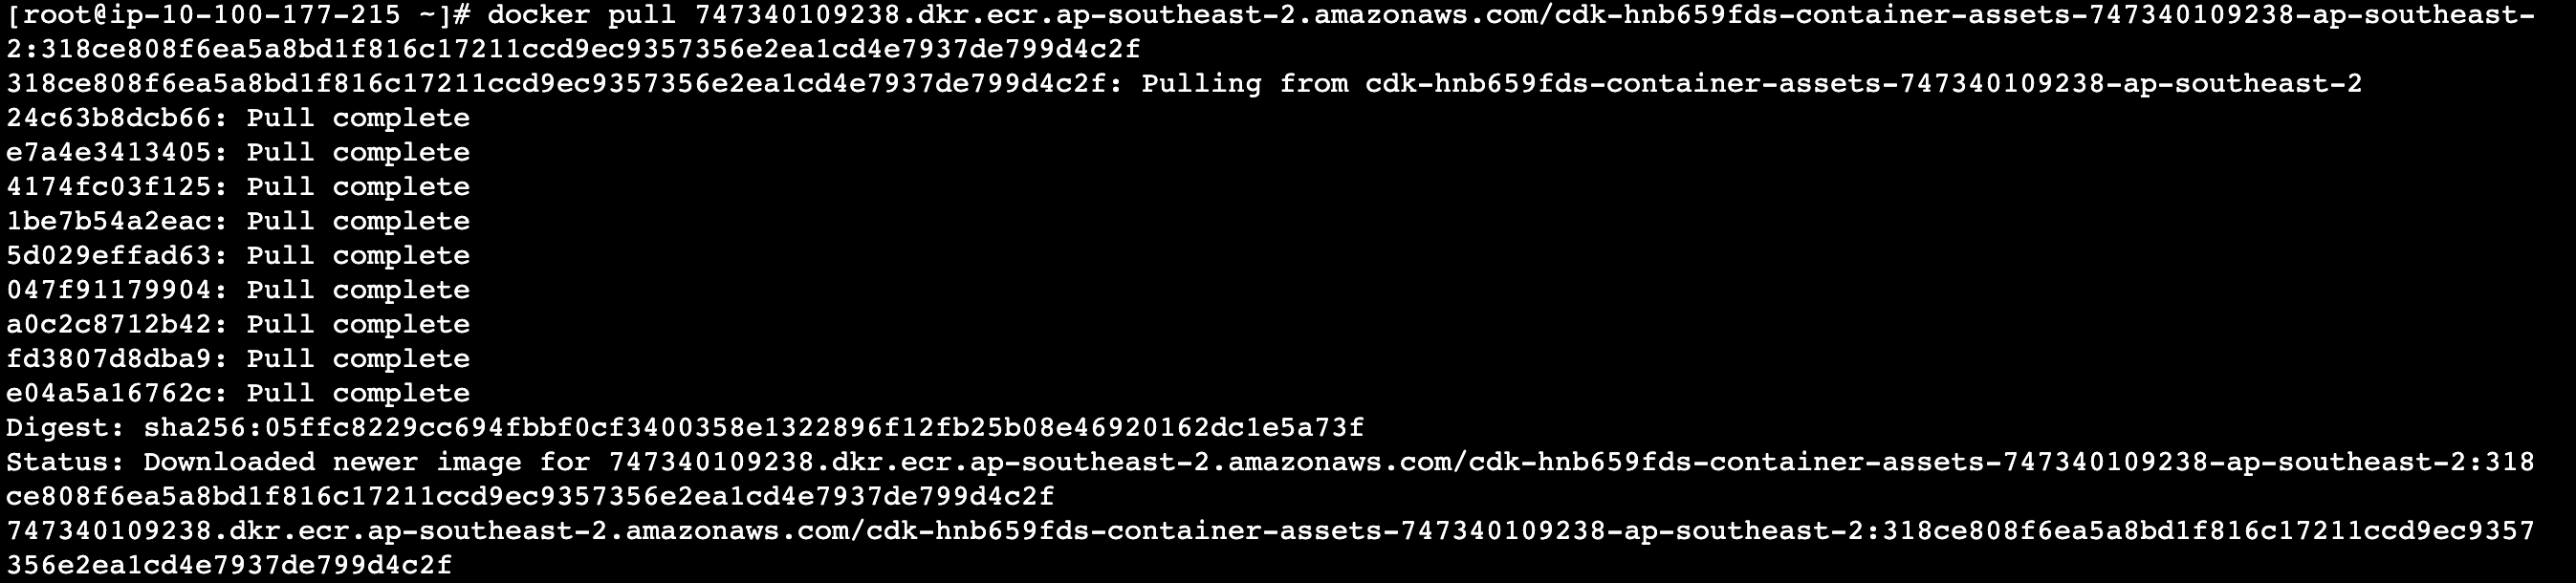
To simplify things for myself, i’ve bootstrapped the EC2 with running the docker container on it’s first boot.
In the userData there is a script to perform the following:
- install docker
- authenticate to AWS ECR (where my image is stored)
- pull image
- run image containing the example api
UserData Logs: Auth to ECR UserData Logs: Pull Image UserData Logs: Run Image

RDS
export class RDSStack extends Stack {
  db: rds.DatabaseInstance;
  constructor(scope: Construct, id: string, props: RDSStackProps) {
    super(scope, id, props);

    const securityGroup = new ec2.SecurityGroup(this, 'DatabaseSecurityGroup', {
        vpc: props.baseStack.vpc,
    });

    this.db = new rds.DatabaseInstance(this, 'Instance', {
        vpc: props.baseStack.vpc,
        engine: rds.DatabaseInstanceEngine.POSTGRES,
        instanceType: ec2.InstanceType.of(ec2.InstanceClass.R6A, ec2.InstanceSize.XLARGE),
        allocatedStorage: 20,
        credentials: rds.Credentials.fromGeneratedSecret('postgres'),
        vpcSubnets: {
            subnetType: ec2.SubnetType.PRIVATE_WITH_EGRESS,
        },
        securityGroups: [securityGroup],
    });

    securityGroup.addIngressRule(props.asgStack.securityGroup, ec2.Port.tcp(5432));
  }
}
A standard PostgreSQL database. Nothing much of interest to discuss here.
Discussion
Stage 1 is as vanilla as it gets.
It’s simple, it’s effective, but it’s wasteful. We’re paying for unused CPU and Memory in both our database and our backend servers.
Let’s attempt to improve this in stage 2.
Stage 2 - Guilt
The goal is clear: Reduce the compute delta.
Let’s get a quick win by containerizing the application and running on ECS Fargate. But what about the database?
Serverless Relational Database
Due to the time and cost involved, migrating database engines is often not an option. However, we still want to reduce the delta without investing too much time and cost.
AWS has a serverless relational compute engine called Aurora Serverless. It’s only compatible with MySQL or PostGreSQL. Get in touch with the experts to see if this is suitable for you!
Our example company hasn’t talked to the experts, but Aurora Serverless looks like a good option so let’s implement it anyway!
I hope our application & access patterns makes Aurora Serverless a cost competitive solution!
Architecture
Stage 2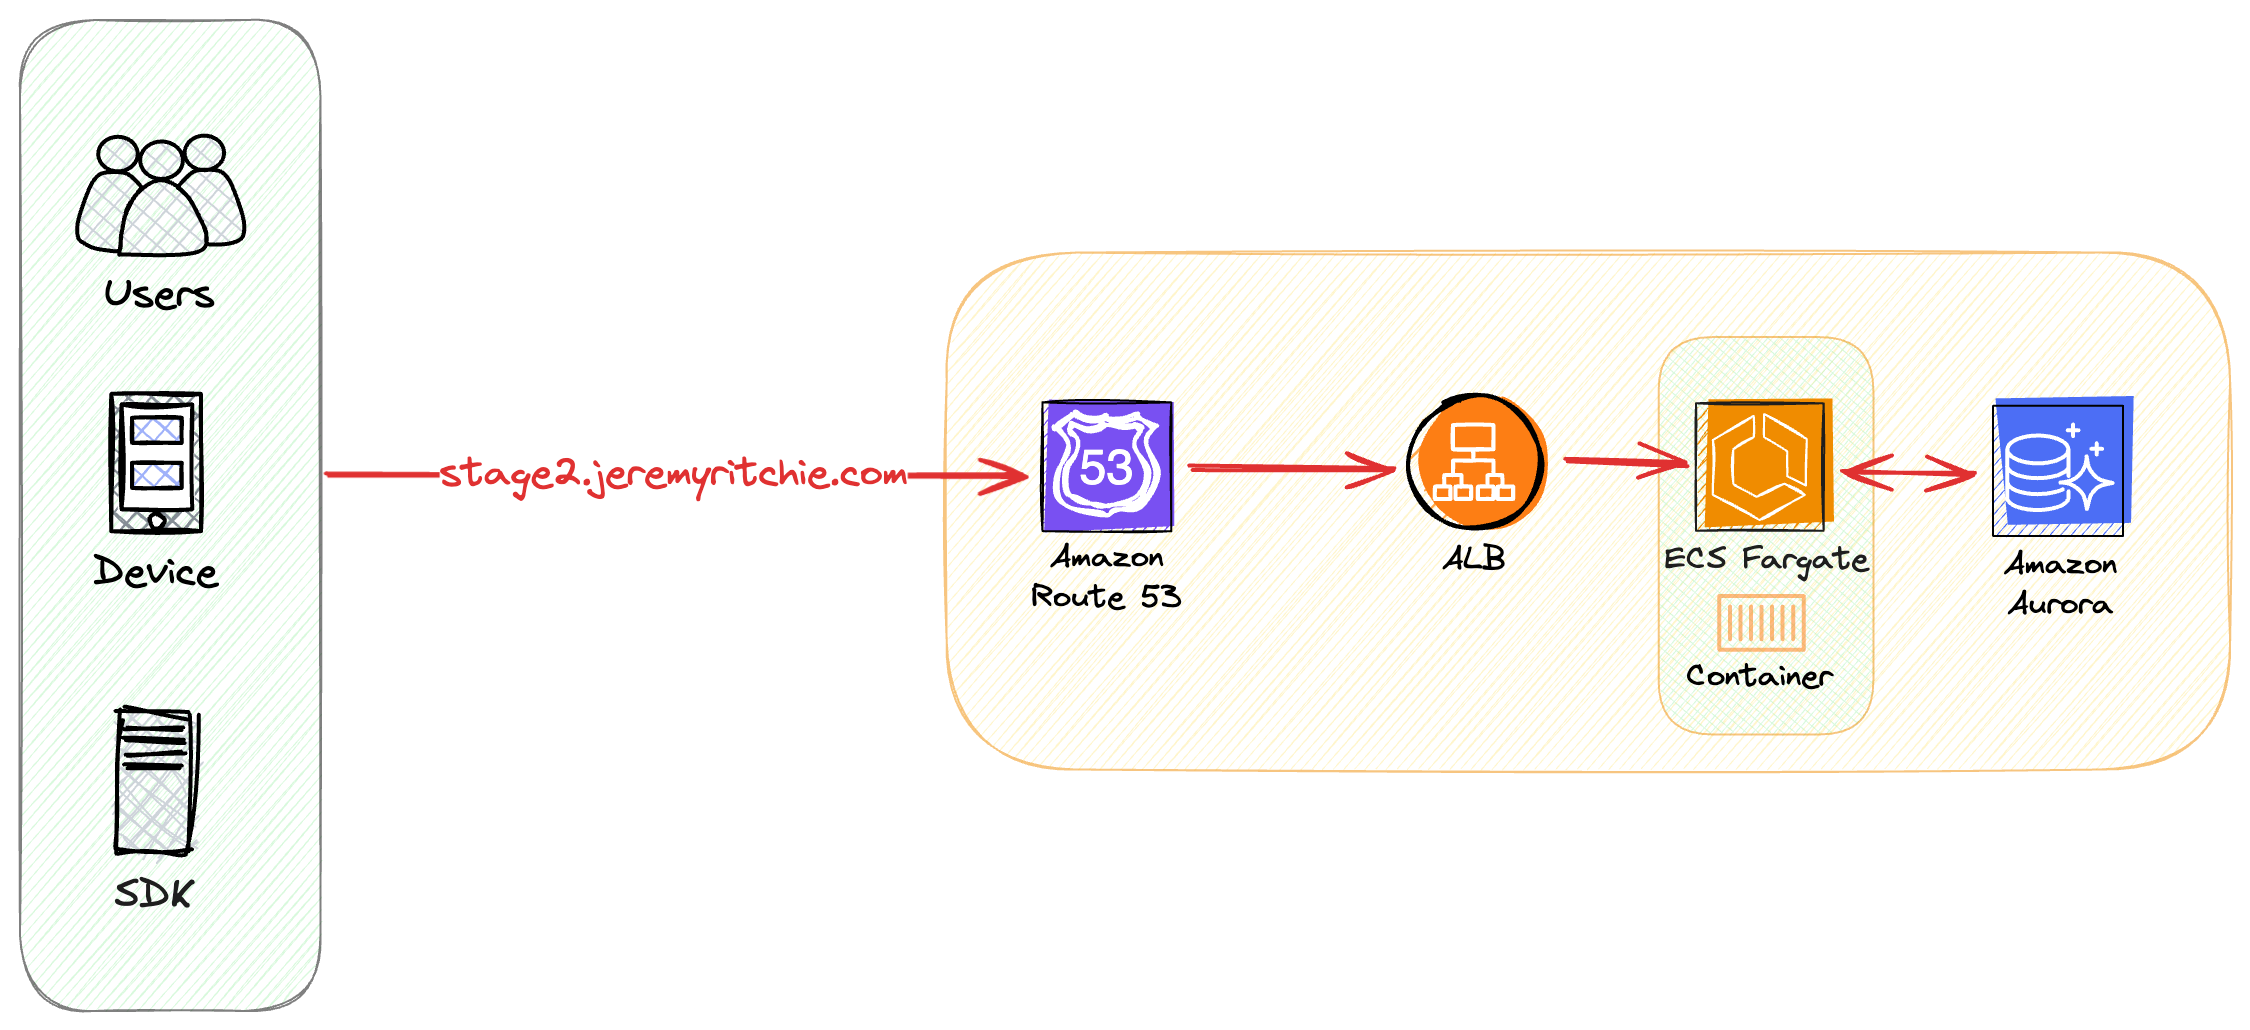
This architecture is similar to Stage 1, with two key differences:
- Compute: We replaced EC2 with ECS Fargate
- Database: We replaced RDS with Aurora Serverless
Compute Delta (Lower is better)
- Compute: 5/10
- Database: 4/10
Press here to skip to stage 2 discussion
Stage 2: Root URL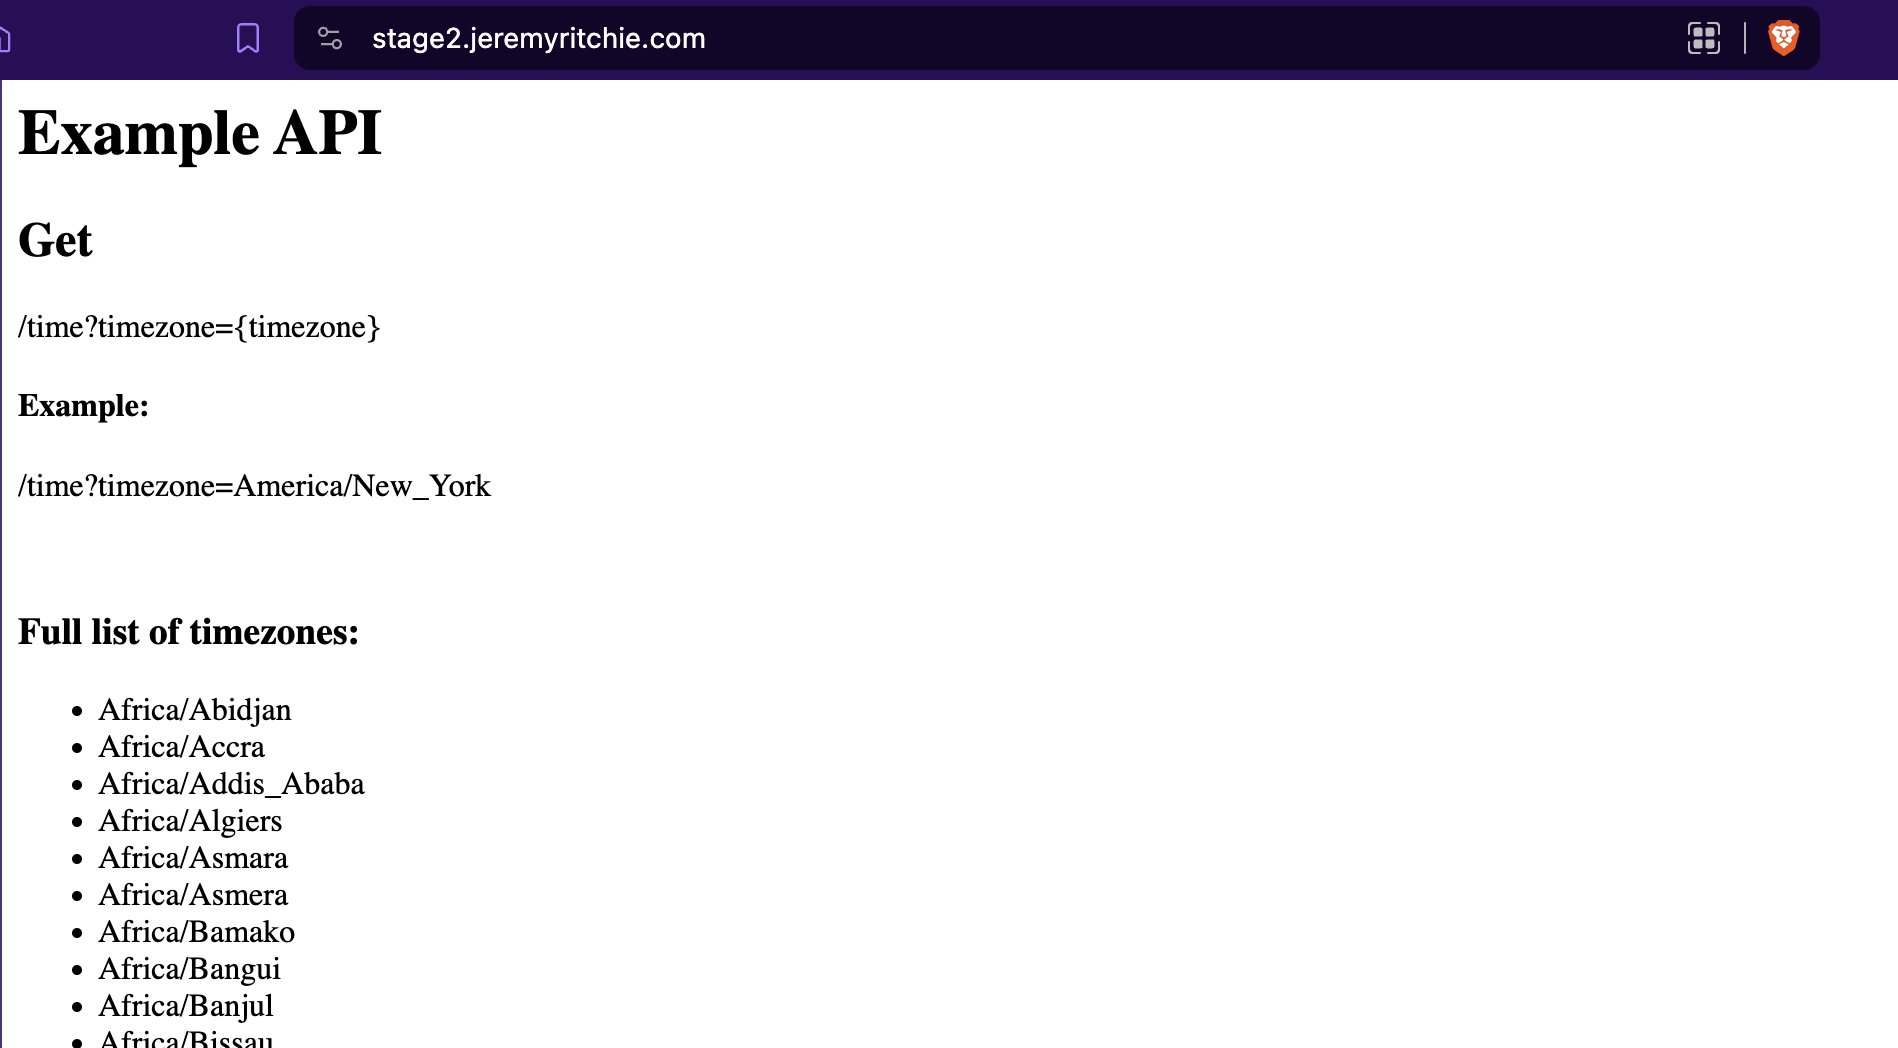
Stage 2: Time API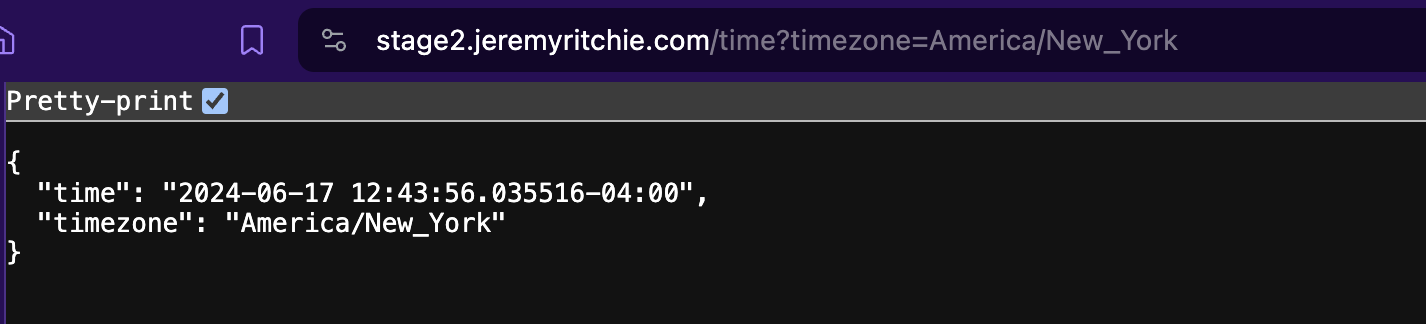
Code
Stage 2 Construct
export class Stage2 extends Construct {
  constructor(scope: Construct, id: string, props: Stage2Props) {
    super(scope, id);

    const base = new BaseStack(this, 'BaseStack', {
        env: props.env,
        cidr: '10.101.0.0/16',
    });

    const route53 = new Route53Stack(this, 'Route53Stack', {
      env: props.env,
      subdomain: 'stage2'
    });

    const alb = new ALBStack(this, 'ALBStack', {
        env: props.env,
        baseStack: base,
        targetType: elbv2.TargetType.IP,
        route53Stack: route53,
        enableHttps: true,
        enableHttpRedirect: true,
        createDNSRecord: true,
    });

    const ecs = new ECSStack(this, 'ECSStack', {
        env: props.env,
        baseStack: base,
        albStack: alb,
    });

    new AuroraStack(this, 'AuroraStack', {
        env: props.env,
        baseStack: base,
        ecsStack: ecs,
    });
  }
}
ECS
export class ECSStack extends Stack {
  service: ecs.FargateService;
  constructor(scope: Construct, id: string, props: ECSStackProps) {
    super(scope, id, props);

    const cluster = new ecs.Cluster(this, 'Cluster', {
        vpc: props.baseStack.vpc,
    });

    const taskDefinition = new ecs.FargateTaskDefinition(this, 'TaskDef', {
        memoryLimitMiB: 512,
        cpu: 256,
        runtimePlatform: {
            operatingSystemFamily: ecs.OperatingSystemFamily.LINUX,
            cpuArchitecture: ecs.CpuArchitecture.ARM64,
        },
    });

    taskDefinition.executionRole?.attachInlinePolicy(new iam.Policy(this, 'task-policy', {
        statements: [new iam.PolicyStatement({
            actions: [
                'ecr:GetAuthorizationToken',
                'ecr:BatchCheckLayerAvailability',
                'ecr:GetDownloadUrlForLayer',
                'ecr:BatchGetImage',
                'logs:CreateLogStream',
                'logs:PutLogEvents',
            ],
            resources: ['*'],
        })],
      }));

    taskDefinition.addContainer('Container', {
        image: ecs.ContainerImage.fromAsset(path.resolve(__dirname, '../../../flask-app')),
        memoryLimitMiB: 256,
        cpu: 128,
        portMappings: [{ containerPort: 8080 }],
        logging: ecs.LogDrivers.awsLogs({ streamPrefix: 'flask-app-ecs' }),
        environment: props.environmentVariables,
    });

    this.service = new ecs.FargateService(this, 'Service', {
        cluster: cluster,
        taskDefinition: taskDefinition,
        desiredCount: 1,
        assignPublicIp: false,
    });
    this.service.connections.allowFrom(props.albStack.alb, ec2.Port.tcp(8080));
    props.albStack.targetGroup.addTarget(this.service);
  }
}
Instead of running our Containerized API on EC2 inside an autoscaling group. We’ve deployed it to ECS, running on Fargate.
Fargate is more expensive than EC2 per vCPU, however it provides excellent elasticity and flexibility. Our application has unpredictable traffic and fargate will be far superior at matching required compute capacity, saving us money though reducing wasted compute.
Aurora
export class AuroraStack extends Stack {
    cluster: rds.DatabaseCluster;
  constructor(scope: Construct, id: string, props: AuroraStackProps) {
    super(scope, id, props);

    const securityGroup = new ec2.SecurityGroup(this, 'DatabaseSecurityGroup', {
        vpc: props.baseStack.vpc,
    });

    const parameterGroup = new rds.ParameterGroup(this, 'ParameterGroup', {
        engine: rds.DatabaseClusterEngine.auroraPostgres({
            version: rds.AuroraPostgresEngineVersion.VER_15_5,
        }),
        parameters: {
            'shared_preload_libraries': 'pg_stat_statements',
            'pg_stat_statements.track': 'all',
        },
    });

    this.cluster = new rds.DatabaseCluster(this, 'Database', {
        engine: rds.DatabaseClusterEngine.AURORA_POSTGRESQL,
        writer: rds.ClusterInstance.serverlessV2('writer'),
        serverlessV2MinCapacity: 0.5,
        serverlessV2MaxCapacity: 10,
        vpc: props.baseStack.vpc,
        credentials: rds.Credentials.fromGeneratedSecret('postgres'),
        parameterGroup: parameterGroup,
        securityGroups: [securityGroup],
      });

    securityGroup.addIngressRule(props.ecsStack.service.connections.securityGroups[0], ec2.Port.tcp(5432));
  }
}
<sarcasm>
I’ve migrated our database engine to serverless. The CTO & other senior management is going to be so pleased with how much money we’re going to save.
I deserve a pat on the back.
</sarcasm>
Discussion
Compute
The API has been containerized and is running on ECS Fargate. This highly reduces time to deploy compute capacity, enabling more effective auto scaling and therefor a reduced compute delta.
Database
The database has been migrated to Aurora Serverless, which automatically scales capacity up and down based on usage. Due to the volatile loads, the database is still generally over-provisioned, but there has been some reduction in compute delta. However, you’re now paying more for less compute on the Aurora Serverless platform.
Let’s quickly dive into this:
r6a.xlarge:
- 32GB memory
- 4 vCPU
- $0.2718 per hour (on demand in ap-southeast-2)
0.5 ACU:
- ~ 1GB memory
- ‘corresponding CPU’
- $0.10 per hour (ap-southeast-2)
Aurora has excellent use cases for highly variable workloads, and ours is highly variable - So why is it not cost competitive? We’ve switched to Aurora, and are saving money in the low-usage times. However we’re now spending much more in the high usage times.
Aurora serverless is costing our example workload more. But it has reduced our compute delta significantly. Aurora severless can be an excellent choice for some applications - it’s just not for us. Read more about it here.
So it turns out our workload wasn’t suitable for Aurora Serverless! Yikes - I guess we should have contacted the experts…
Why didn't anyone tell me?
Conclusion
Embracing serverless requires a mindset shift, but can lead to fantastic elasticity, significant cost savings and agility when done correctly. The key is finding the right stage to start your serverless journey based on your existing architecture and requirements, and carefully evaluating the trade-offs and suitability of various serverless architecture for your specific use case.
In Serverless Upgrade Path in AWS (Part 2) we will explore how our serverless upgrade path was flawed and what better approaches there are to upgrade our serverless architecture incrementally, with reduced transformation risk and business disruption in stage 3 and stage 4.
Full source code available here